Friday, September 27, 2013

The Mario Quilt, Finished

Finally done! This quilt was a lot of fun to build and put together, all at the direction of my eight year old son, who dictated each aspect of the scene --- from having half a "Goomba" (that funny looking, one-eyed creature on the bottom left corner), to the shadows under the floating-in-midair coins (top right).

I absolutely loved collaborating with him, although I did suggest in the beginning that we do the scene so that it fit just on the center, the part that would actually sit atop his bed, and thus be able to see all of it. We could do a border around the edge. He didn't like that idea, and wanted the border to be further extension of the scene. The other boys claimed too that the quilt needed to be edge-to-edge in order to have the level of detail we wanted; I was not willing to compromise on how small to make each patch, and so edge to edge it is.
on my bed, showing the full scene, edge to edge

Even though it does, in fact, hang over the sides and mean the whole scene is not fully visible at once.
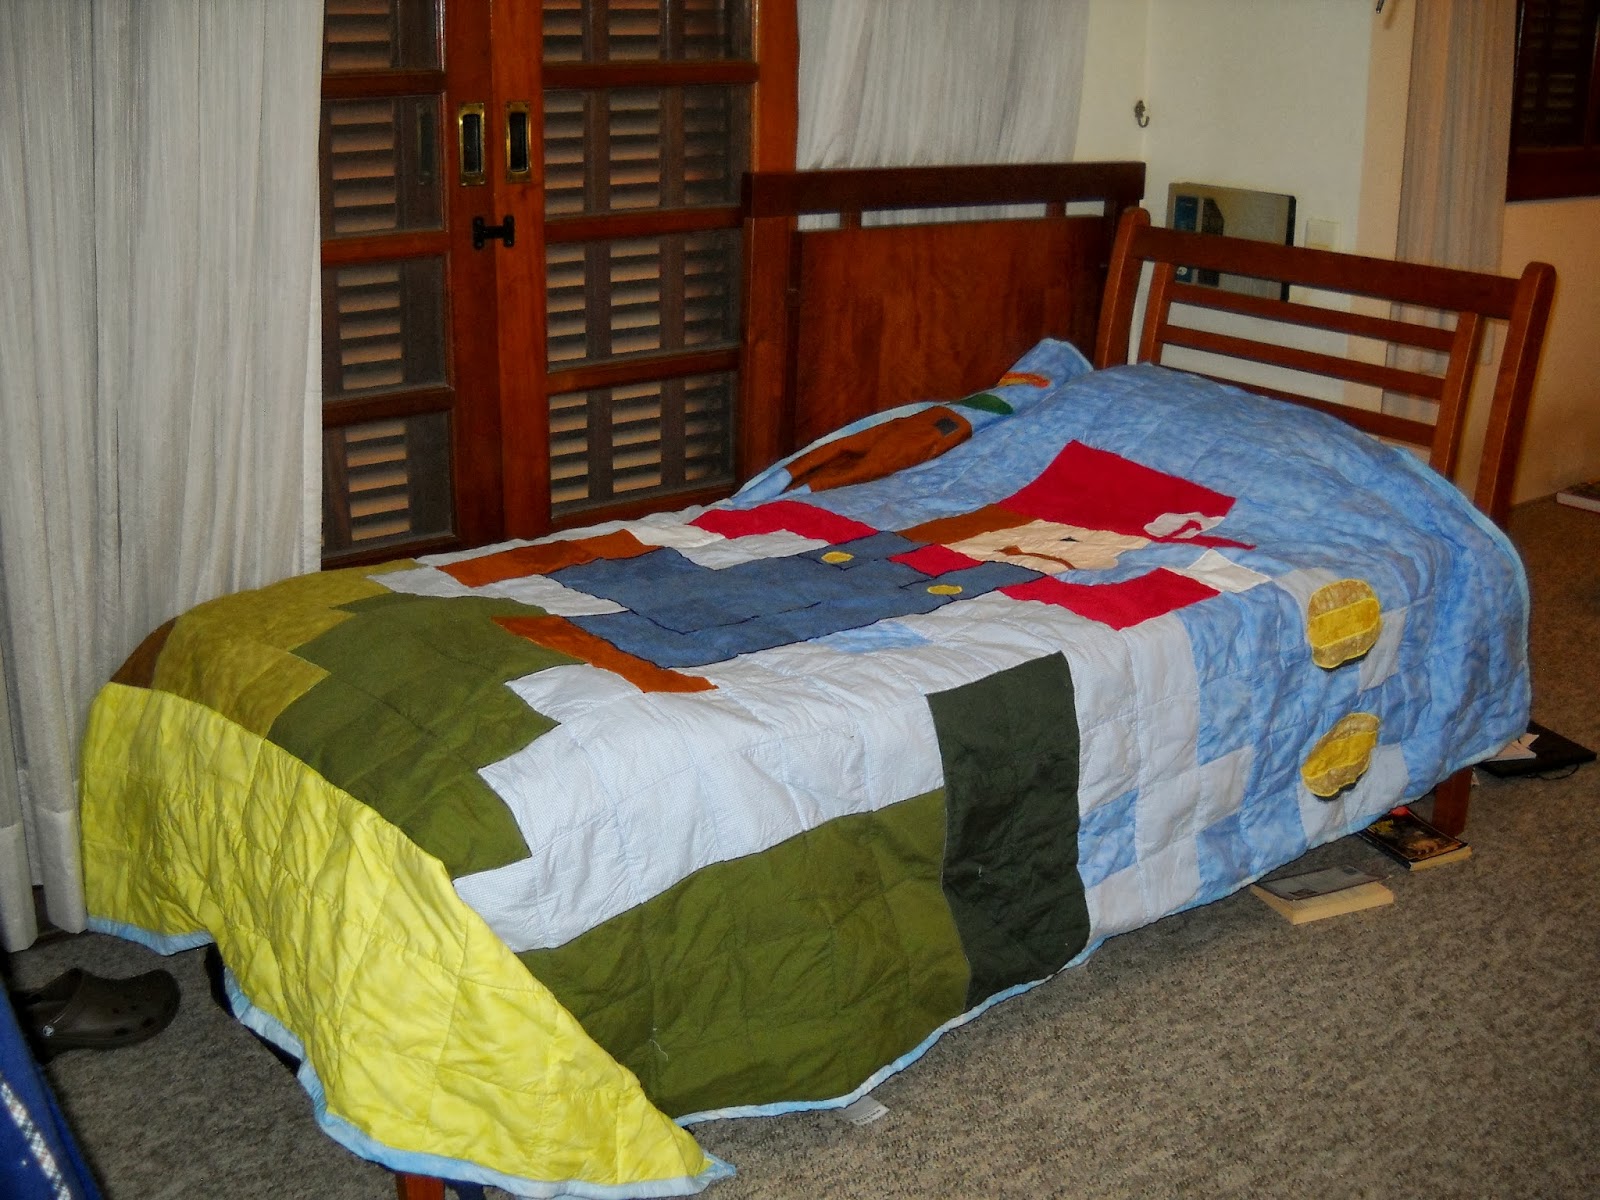
on his bed, scene not fully visible
Still, I quilted it up this week --- I used YLI Invisible thread for the quilting, and King Tut variegated blue to white in the bobbin, to match the sky blue backing fabric. The two threads worked beautifully together!

This quilt was easier to quilt than some of my others, due to a couple of things. One, I bought actual pins while in the US, so it was much easier to baste, and the basting stayed put. Huge difference that made. Huge. Also, I ironed/pressed everything before I started this quilt and as I went along. The fabrics were all ironed and starched before I cut; the sections were all pressed as I finished each one; huge difference. Next time I will remember to give a final press to the top and iron the backing fabric, tedious as those jobs are. The other factor was size; the last two quilts I've done have both been for a full sized bed, while this one is for a twin. That little-bit-less bulk made it so much easier to handle!

It's now been washed & dried --- love using Shout Color Catchers --- the red next to white, and the black against the yellow and light blue both had me worried. I threw in 8 color catchers (which all came out just barely the lightest peach color, so maybe the fabrics didn't bleed terribly anyway) and it was totally fine. Whew! I'll probably keep using color catchers for the next few washes just in case; better safe than sorry!

I'll start cutting the fabric for my husband's quilt next week....this weekend, I need a break!

Friday, September 20, 2013

Shopping Trip! aka, What's Next in Line?

My family & I recently went home for a visit to the US, and of course I hit my favorite quilt shops while there. Fabric in Brazil is expensive, not as fun, expensive, harder to find, and expensive. As I loaded up on yard after yard of fabric, a little worried about the price, I reminded myself  "it would be four times this in Brazil....."  Amazingly, I stuck to my plans for shopping and didn't go crazy with extras.

First up -- backing for the Diary Quilt. I failed to snap a photo before I sent it off to my very dear friend & long-arm quilter, who will finish it for me, but I got a really yummy butterfly batik in blues & greens. I kind of think it's too modern for the front, and a little part of me wishes I'd stuck with the cream colored print that was old letters, or else the tone-on-tone cream & beige that was dandelions. I shied away from the creams because I didn't want the back to show dirt. I am probably going to second-guess that decision for a while, but I'm telling myself two things to help --- one, the butterflies are significant, and I do love that I found a great butterfly print. Love it. Two, I think a modern back to a traditional front fits since I'm a more modern quilter; it gives one more level to the "past, meet future" aspect of the quilt. And anyway, it's done now; too late and too expensive to change it at this point. (yes, I did consider buying the other fabric and saving the butterflies for something else.....but that many  yards is a lot to just buy extra.....).

Second up -- backing for the Mario Quilt. My boy requested sky blue, so that's what he got. I had a moment of panic last night thinking I forgot to get thread for the bobbin -- I'm using clear thread by YLI for the front -- until I remembered I have some blue-to-white variegated King Tut I can use, if it's not too much for the bobbin.....

backing fabric for the Mario Quilt
Third and almost last, the next in line -- a quilt for my husband, The Chemist. We are facing a move soon, back to the US, but he'll be traveling back & forth quite often. I wanted to make him a quilt he can keep at his "other home" so he's still sleeping under something I made, even while he's away. Sappy & sentimental, I know. It will be an oversized couch quilt when he gets done traveling.

I had him look through images online and pick out a rough idea of what he wanted. He found a strip quilt that was sort of color-blocked, and said, "That one. I like that. But in a different color scheme.....I want it to fade from blue to red...."

I panicked only a little trying to figure out how to get from blue to red without so much purple that it stopped looking masculine. Then I took my mom & sister shopping and we wandered a quilt shop for a really long time, looking at every single purple fabric in the store. I almost gave up, and then I found it, a red & blue overlapping thing. Once we had the purple, the rest was a cinch. I even found a perfect variegated thread to quilt it with; can't wait to get started!
fabric, in order, for The Chemist's color-change quilt
 For real last, I did buy a few things just because. The multi-on-black Sew Heavenly print, which is now out of print, which I have loved and wanted since its debut. I still hope to find the cream tone-on-tone of it, but no one seems to have that one.....(sigh). The Chemist got me the all blue version and the multi-on-blue version for my birthday last year.....I couldn't resist snagging some of this, too. I think these will be incorporated into a back for another couch quilt. I really have a thing for bold, busy backs as a way to showcase fabric I love.
SewHeavenly by Dan Morris for RJR fabrics
 and, who can resist a few fat quarters?! The 2 dark blue are to replace some I borrowed from my stash for the Diary Quilt border; the rest are just 'cause they seemed awesome. Fat quarters are my downfall.....I have yards and yards of stash made up of fat quarters.

just for fun
 What fabric style do you buy? Yardage? Pre-cuts? Fat Quarters? What is it you just can't resist in a fabric shop??

Monday, August 5, 2013

One More Finished Top -- The Diary Quilt

This quilt is probably the most emotionally significant project I've done to date, and likely will remain so for a very long time. It is the second project I ever started, with fabric purchased in March 2011, and the first block pieced (by hand) that April.

Today, August 2013, I took the final stitch (by machine) on the quilt top. Two years, four months. That's a long time in the making, and it's still to be quilted, but I need to buy backing fabric first and then work up the nerve to quilt it myself, or send it to my favorite long-arm quilter.

Each block tells a story. The center squares of each were pieced by hand, because I didn't get my machine until August 2012, and by then, I'd finished the blocks. Then I added setting triangles, to turn them on point and enlarge the quilt; I did that by machine. For a long time I had a pile of blocks sitting and waiting, while in the meantime I worked on quilts for my boys. The Comic Book Quilt for my oldest; then the Legend of Zelda's Cat Quilt for my middle son, and most recently the Mario Quilt for my youngest. With that last quilt top finally done, I was once again free to return to my project instead of one of theirs.

I tackled the most difficult chore of assembling my first "on point" quilt. Much trial and error, terrific use of the seam ripper, and finally I had all the rows together in order and the top emerged. Whew! It wasn't easy. I messed up, a lot. But I did it, and turned to my stash to figure out borders. Now that I was so close, I wanted it done, and I didn't want to spend extra money if I didn't have to.

blocks, with sashing added, rows laid out

the top before any borders
MUCH trial and error to get the rows correct,
as I originally added the triangles flush with the wrong side of half the rows
I added the top row of straight-set blocks, to incorporate an antique block (by creating additional blocks that mimic the antique one). I edged the whole entire top in the black & white background print, then added a blue inner border from stash fabric from another project and then I planned and plotted. I wanted scrappy, but planned. I didn't want the borders to look like they were thrown together at the last minute, even though they were.

side view of the top row
the center off white/pink block is an antique
the rest were made to mimic that
A friend suggested I do evenly spaced hour glass blocks, in scrappy fabrics from the quilt top. I kept seeing in my head pinwheels instead of hour glasses, so worked up a Piano Key/Spaced Squares border on my EQ7 software. Then I cut all my scraps into the length  I needed (the unfinished width of the border) and into 2 different sized widths to give a more interesting look to the border. I cut pinwheel pieces, and sewed those. And then yesterday I finally worked on that border and it all came together.

Today I measured and figured and measured and figured and swiped one more fat quarter from my stash so I could do an outer border in the same solid navy as the inner border, so that the piano key/scrappy border would seem to float the way the blocks do. More cutting and sewing and measuring and pinning and sewing and then......it was done.


Checked it on the bed to be sure it was really, truly the right size. It is.

on our bed, with each border falling just where I hoped it would
(color is more accurate in the previous photo taken outdoors)
And so, at long last, the quilt top that started as a pile of carefully chosen fabric in March 2011 is now a finished top, waiting on backing and quilting, as of today, August 5, 2013. I am still in awe......and hopeful it won't be another two years before the quilting is done!

Monday, July 15, 2013

...and DONE! Super Mario Quilt for a Super Boy!


So, I meant to have step-by-step and progress photos/posts along the way, but I kept working and forgetting to take pictures. Oops!

I'll be back with some close-up shots later on, because every single component is outlined with a tight zig-zag stitch (you can see it a bit on the overalls, where I cut in to give detail between the legs, around the straps, etc.). Yes, that is A LOT of work, and a LOT of thread! But so worth it!

My little boy is THRILLED! He designed the whole thing, based on the Super Mario game that is so popular. He explained each item he wanted, where he wanted each thing placed, etc. I had an amazing time collaborating on this with him! If you've never collaborated on a quilt with an 8 year old.....it is truly something magical, that's for sure!

I'm setting aside the top, for now, and will quilt it after an upcoming US trip; with so many color changes, and not wanting red quilting lines across Mario's face, for example, I decided I'd better use clear thread, which I can't get here. So, folded and to the shelf it goes for now, waiting on thread and backing fabric, and I'll quilt when we're back from our trip.

So glad to have the top done, though!! and my boy is happy, which makes all the hard work so very worth it!


Friday, June 21, 2013

Top Third Completed! The Super Mario Quilt is on its way!

I am so glad I thought to segment this quilt into sections (not sure what I'm talking about? click on the "Super Mario Quilt" link/tab below this post and read up on previous posts....) rather than do straight rows across as I usually would. Being able to see recognizable portions of the picture come together is so much more encouraging than just row after row after row of colored blocks!

The section with the brown square, known as an Item Block, was first. Didn't look like much until I added the little black rivets or detail bits, per my 8 year old's instructions, but once that was added, it looked like what he wanted.
just the Item Block (except I held it sideways, so the photo is sideways to make the quilt section right side up!)

Next was the section with Mario's face.  As just a set of blocks, it was a bit boring. I had my son pull up on-line images showing me the facial features we needed to add -- as this is a side view, we added one eye, his nose, his mustache, and half the white circle & half the red M on the hat.  My son said we could skip the sideburns and ear.

Mario's face, hat & one arm in a sky background -- the Before
Look! Mario has a face now!  -- the After
joined the Item Block section to the Mario Face section
Before I added the appliqued coins
Then I appliqued on the coins floating in the air. Again, pulled up a picture and my boy explained that I had to include the black, not blue, shadow behind the coin. So I drew that out, cut it from the yellow fabric he chose from my stash, and glued then sewed down the coins. Whew! What a difference they make!

cut & glued in place, waiting to be sewn down
I used a machine super-tight zig zag applique
don't those coins look good floating there?! 
Next, time to work on the body section.....sure is fun watching this come together, especially as a collaboration with my youngest son! So fun!!

Monday, June 17, 2013

Some Tips, and a Beginning

Whew! Let's get sewing on this thing, shall we??  Before I begin, though, a few things I did to make my life easier.

First, the problem of so many greens in one quilt. I did not trust myself to keep them all straight once they were cut into their squares and stacked in my "work in progress" tote. What to do so that I don't mix up which green I need and wind up short on one fabric, long on another??

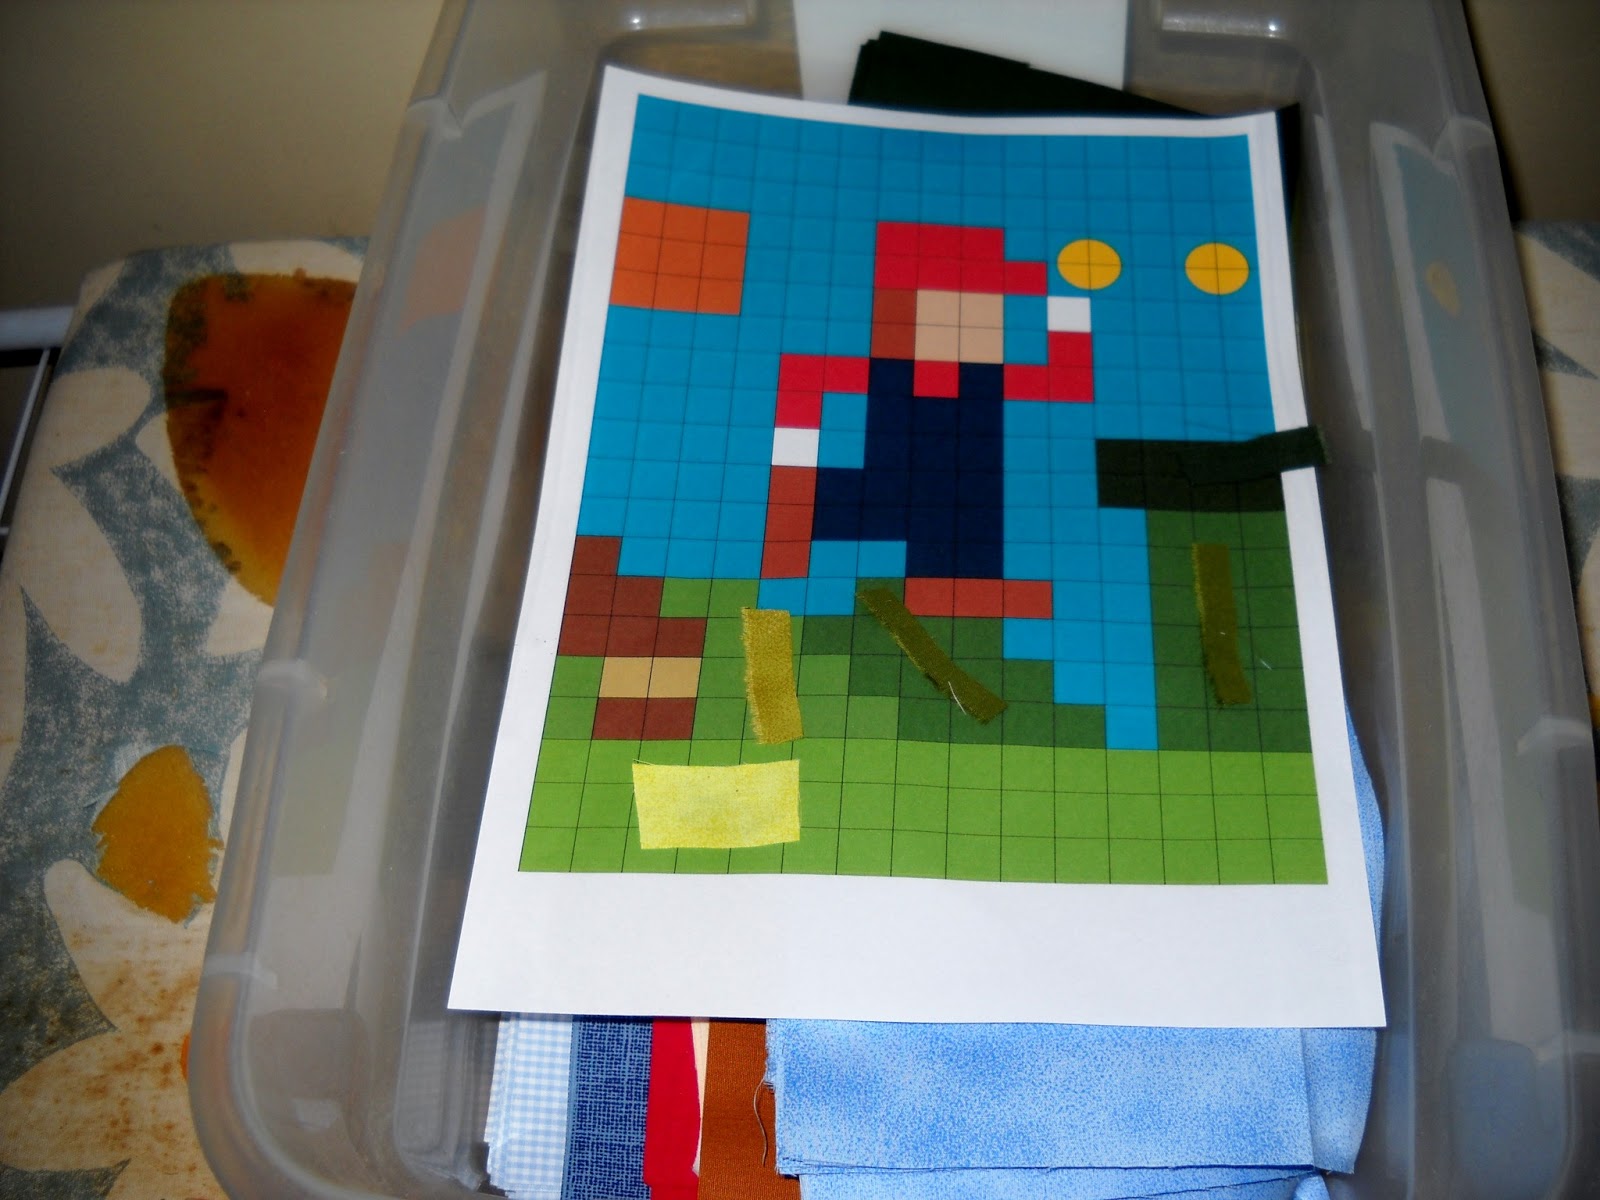
I came up with an easy solution! Since I'm working from a color print out of the design anyway, I simply cut little pieces from the scraps of each and glued them to the color print out.  Now, I have a fabric sample attached right where I need it, on the very print out I'll use as my map as I sew. Since I'll be looking at the print out to make sure I get each square in the right place anyway, this is perfect!

each green fabric, plus little scraps on the print out


the print out, in the tote with the cut squares, ready to go

The other problem is, do I really want to sew one row together at a time (the quilt size is 75" x 100" finished); can you imagine making 20 rows, each 75" long? And then having to sew seam after seam to join those 75" long rows together???  Hmmm, that seemed daunting to me and like a perfect recipe for rows to go crooked and seams to go wonky. Not cool.

How to approach quilt assembly, then??   Back I went to the print out. I first thought simple quadrants, but that chopped things up too much and still left pretty large/long seams. Hmmmm. I looked a bit longer and decided to find natural breaks in the quilt and use those.

I used a highlighter to mark off what my sections will be
top row: 2 sections, divided where Mario's head touches the sky on the left
middle row: 3 sections, divided where Mario's arms bump sky on either side
bottom row: 2 sections, divided at the edge of the 1st hill
Staggering the seams will help the stability of the quilt, too.
Perfect! Now I can do sections, see some progress as I go (and my 8 yr old son will see it too, this way) and then just join section to section and only have to do that long 75" seam twice! Brilliant!!

For the actual assembly, then, I just take a stack of what is needed for the mini-row within the section, sew the fabrics together one at a time (pressing seams open as I go, to reduce bulk), and then will assemble the mini-rows into their respective sections.

sewing! I have my print out (aka, map), my stack of squares, my 1/4" foot,
and I am good to go!
This will also enable me to do the embellishing on each section before it goes together as a full quilt top. As there's quite a bit of embellishing to do, that will be helpful and much easier to manage -- I need to add face details to the Mario, and outline his legs, add buttons to the overalls, that sort of thing. Much easier to handle in small chunks than as part of a whole twin sized quilt.

Can't wait to see this start to come together!

Thursday, June 13, 2013

And now, the next project! Super Mario Quilt for a Super Son!

With quilts finished for Son 1 and Son 2, my youngest suggested it was his turn for a quilt.  I hand't actually planned to start his yet, because he very rarely sleeps in his own room -- our bedroom has a sort of dressing room area that holds an extra bed and he mostly ends up sleeping there. So why make a quilt for a boy who won't sleep in his real bed in his own room?  Well, in hopes that said quilt will be the reason he needs to move back where he belongs, of course!

I took a lovely time out to work on the 15 Minutes of Play Architecture Challenge, but now that it's done (just waiting on binding), time to get on to the quilt my youngest wanted. Being as he's 8 yrs old, his tastes are a little.....well, fun. Whimsical. Little boy-ish. But not too little boyish, as he does have older brothers who are teens or almost teens.  So what did Son 3 want?  Why, a Super Mario Quilt, of course!

I scanned the internet for ideas. I found an absolutely adorable -- truly smashing! -- Quilt Along over at Cut to Pieces.  I ruled it out right away, because living in S. America I do not have access to the fusible stuff that makes her QAL easy to do instead of absolutely crazy. I know my limits, and piecing a bunch of squares that finish at 1", in the traditional, good old fashioned piecing method --- not gonna happen. If you do have access to fusible stuff, her QAL is fantastic and I highly recommend it. If you don't, feel free to use my design instead.

Lucky for me, my son is fairly opinionated and wanted one big scene from the video game anyway, rather than several different characters or images. Whew! His desire and my laziness self limitations work nicely together! I pulled up a simple patchwork layout on my EQ7 and had the boys help me color the squares to resemble the desired scene. My boy was very specific with exactly what he wanted, so I had him sit next to me and tell me when I got the colors just right. I chose the smallest size patch (5" finished) I was willing to work with, we colored in accordingly, and the design was done.

the EQ7 image

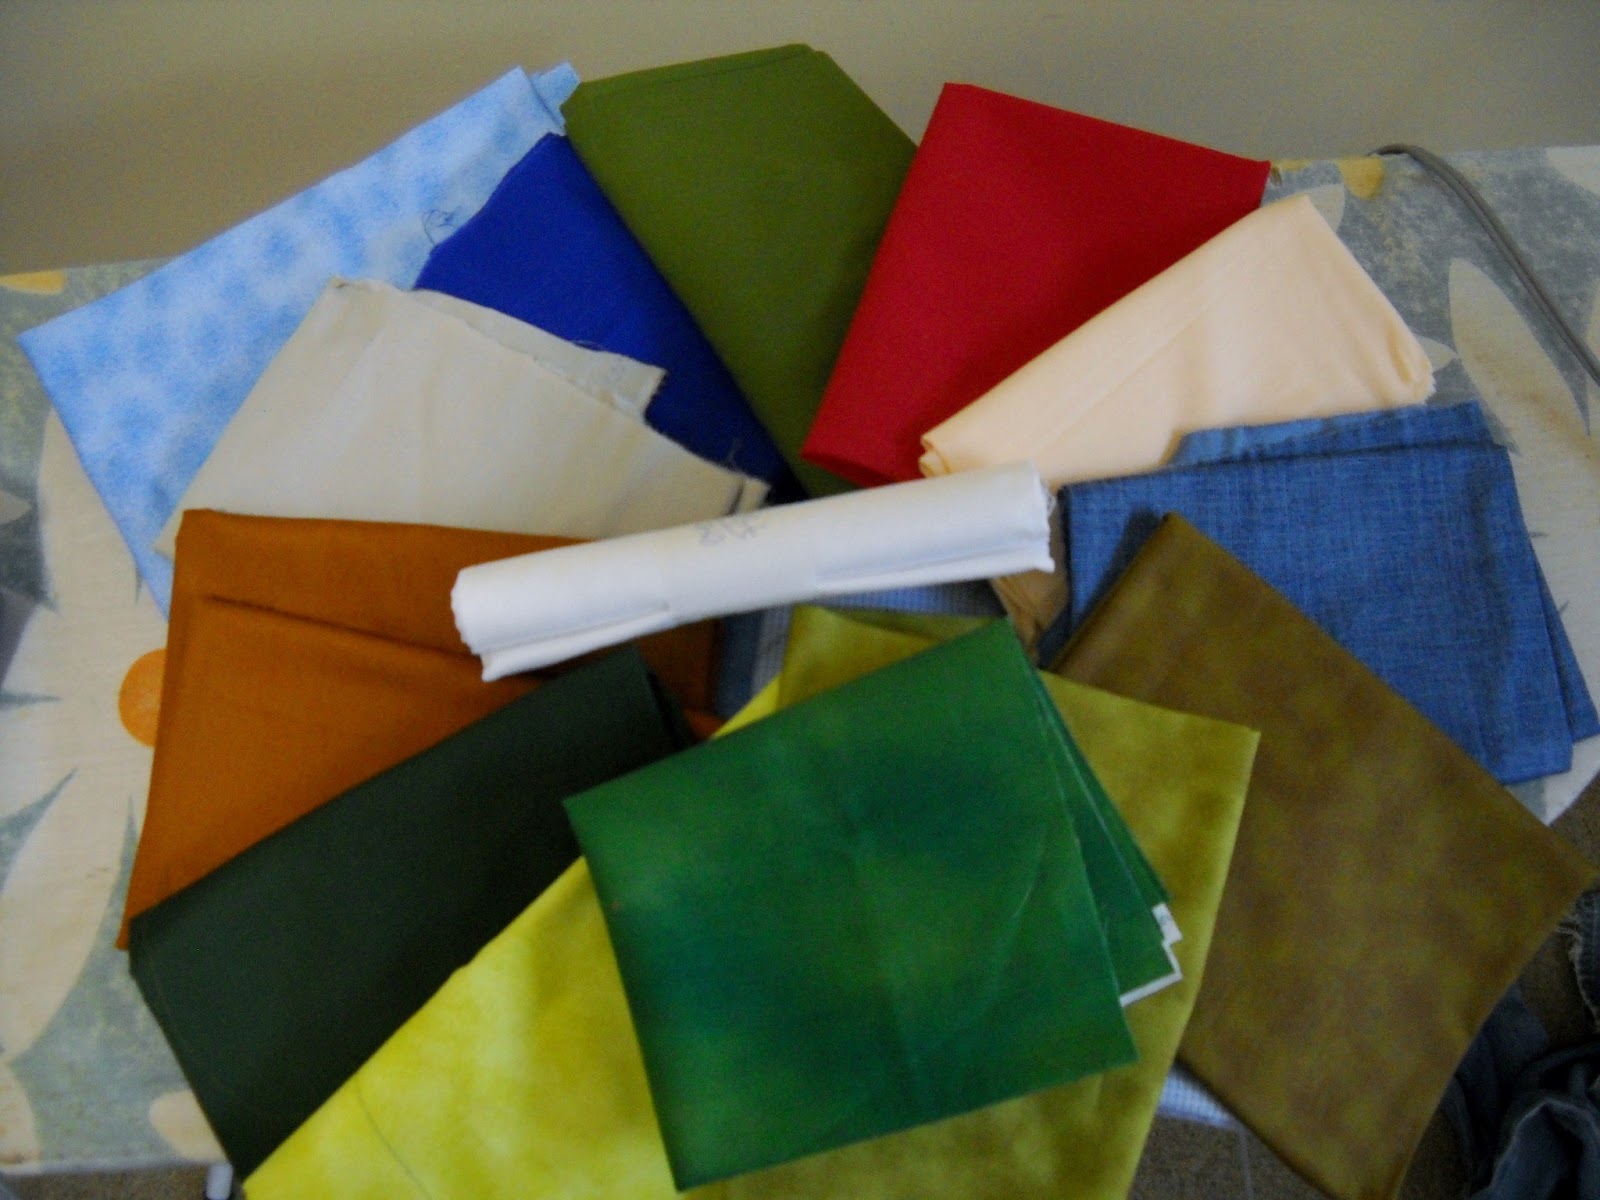
 Later, I took my boy with me to buy fabrics, so he could confirm color choices, then I actually starched the fabrics before I cut them into the needed squares.

all the fabric
Why did I starch the fabrics?? Well, I've noticed that my quilts end up wrinkly. I have two theories on that --- one, some time ago I gave up pressing. At all. I finger press my seams as I go, but I quit pressing finished blocks, or rows, or quilt tops, or backs, or anything. And, well, it shows.  Theory two is that I don't baste sufficiently, which is probably also true. This quilt needing to look crisp due to the design, I decided I'd better get over my lazy self and not skip steps like that anymore. So, I starched the fabric and then cut it.

starching...

starched...

cut!
that is a LOT of squares. so glad I went with 5" finished!

Next up, let's get sewing!