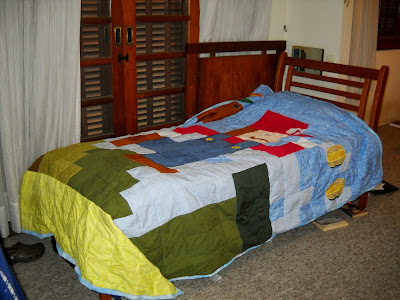
I absolutely loved collaborating with him, although I did suggest in the beginning that we do the scene so that it fit just on the center, the part that would actually sit atop his bed, and thus be able to see all of it. We could do a border around the edge. He didn't like that idea, and wanted the border to be further extension of the scene. The other boys claimed too that the quilt needed to be edge-to-edge in order to have the level of detail we wanted; I was not willing to compromise on how small to make each patch, and so edge to edge it is.
 |
| on my bed, showing the full scene, edge to edge |
Even though it does, in fact, hang over the sides and mean the whole scene is not fully visible at once.
 |
| on his bed, scene not fully visible |
This quilt was easier to quilt than some of my others, due to a couple of things. One, I bought actual pins while in the US, so it was much easier to baste, and the basting stayed put. Huge difference that made. Huge. Also, I ironed/pressed everything before I started this quilt and as I went along. The fabrics were all ironed and starched before I cut; the sections were all pressed as I finished each one; huge difference. Next time I will remember to give a final press to the top and iron the backing fabric, tedious as those jobs are. The other factor was size; the last two quilts I've done have both been for a full sized bed, while this one is for a twin. That little-bit-less bulk made it so much easier to handle!
It's now been washed & dried --- love using Shout Color Catchers --- the red next to white, and the black against the yellow and light blue both had me worried. I threw in 8 color catchers (which all came out just barely the lightest peach color, so maybe the fabrics didn't bleed terribly anyway) and it was totally fine. Whew! I'll probably keep using color catchers for the next few washes just in case; better safe than sorry!
I'll start cutting the fabric for my husband's quilt next week....this weekend, I need a break!

No comments:
Post a Comment