Wednesday, July 22, 2015

I really have been sewing.....

This summer is flying by! I've been busy working on projects, but not busy posting about them....time to catch up some!

Since finishing the EQ7 Scrap Challenge Quilt (which didn't win, but does look great in my game room!), I have:


*finished binding a table runner that is a gift for my sister
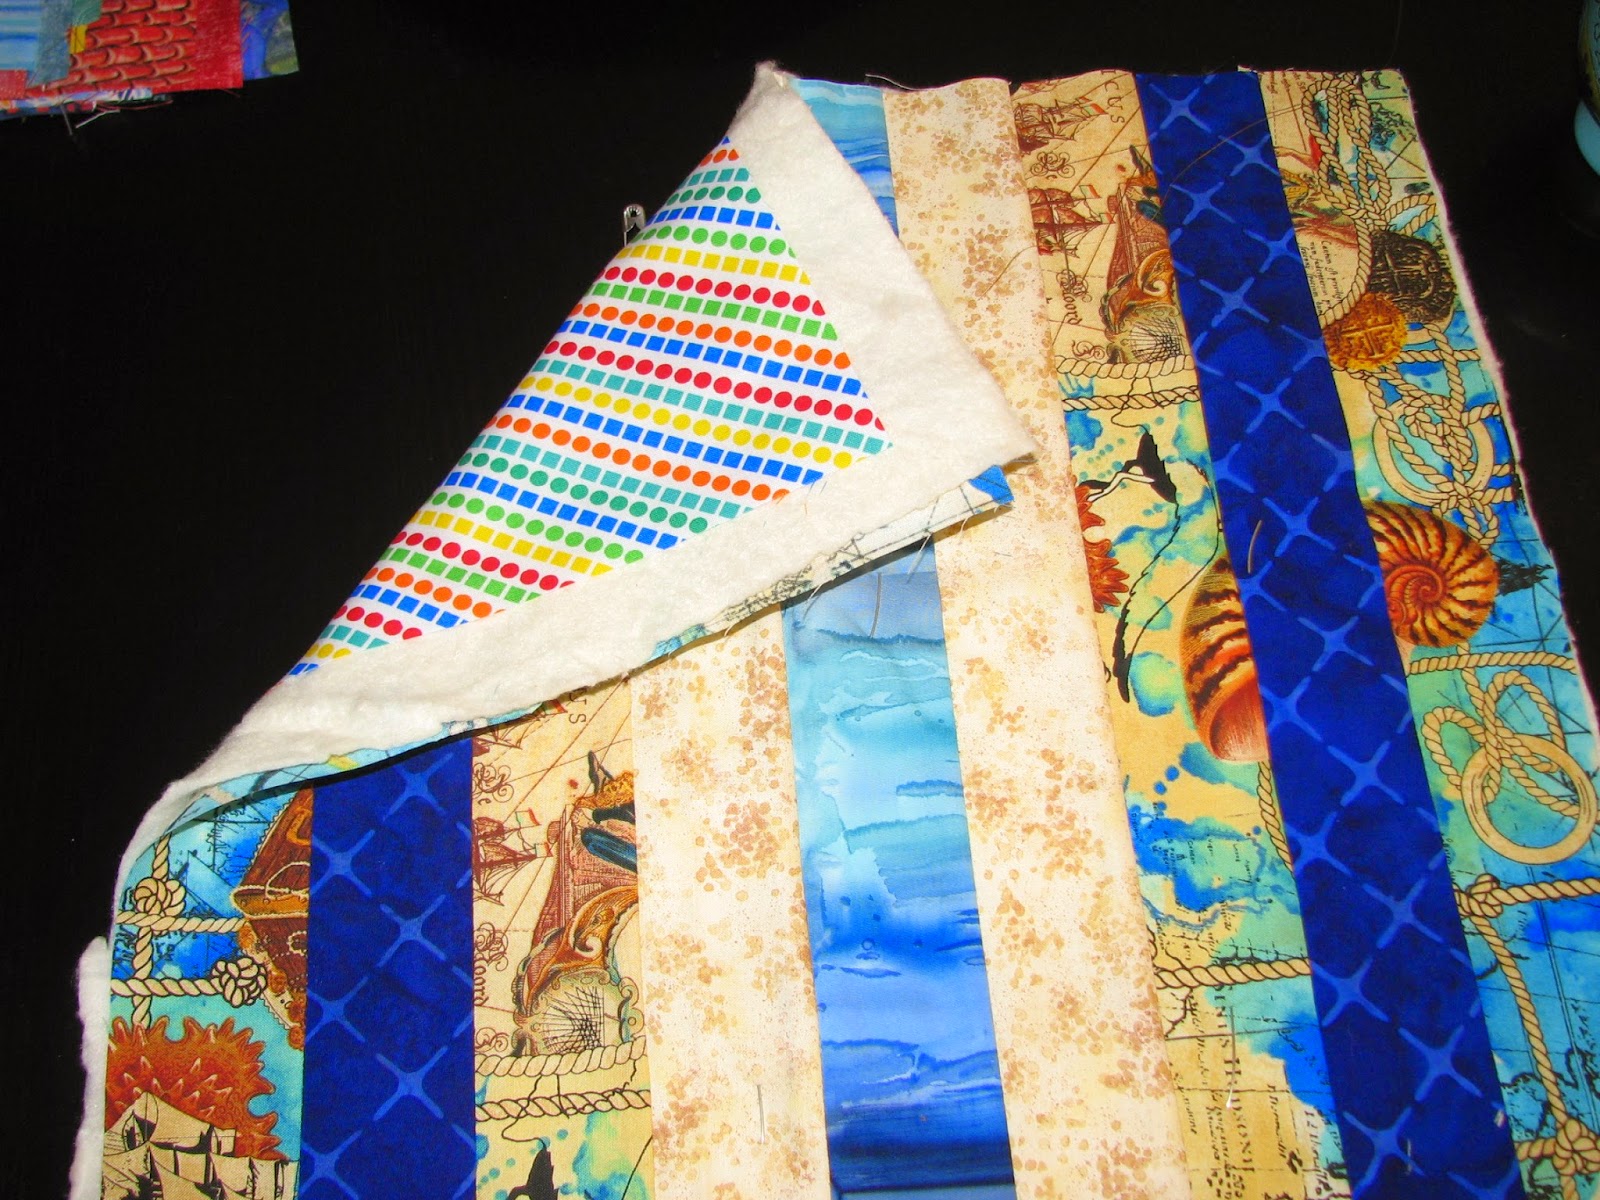
*finished quilting 12 round placemats for my table
*created my first ever continuous bias binding
*attached said binding to the front sides of 6 round placemats
*took advantage of 4th of July sales and bought 30 fat quarters for the price of 20
*made 5 Halloween themed blocks that will become a Halloween table runner
*cut all the pieces for a pattern I bought several years ago
*started piecing the blocks for that same pattern; 13 down, 35 to go....

The table runner for my sister, and the current project, are the only two using purchased patterns; the placemats & Halloween table runner are my design. And this current project actually is adapted by me, and some of the pattern blocks are traded out (or will be traded out) for traditional blocks, from my EQ7 library. And of course is done in my colors, not the published colors.....it makes me twitch to do things that everyone else is doing.

So, pictures of all of that coming soon. For now, the table runner...

from the Cherry Blossoms Bon Appetit Pattern
http://shop.cherryblossomsquilting.com/Bon-Appetit-107.htm

This was a pattern, Bon Appetit by Cherry Blossoms, that I purchased at IQF 2014, in Houston. The pattern came with full-sized and miniature templates and super easy to follow directions. 

I, of course, put my own spin on it --- I used different borders than those in the pattern, and turned the spoon upside down to lie more neatly alongside the fork. I used colors that coordinate with my dishes, thinking I would keep this for myself as an everyday table runner on my dining table; I plan to make seasonal runners as well. 

Once I finished the table runner, though, I felt it did not coordinate well enough with the regular day-to-day decor in my dining room, which is very distinctly beach themed (even though it does coordinate perfectly with my dishes, which are Fiestaware in all the colors). 

I debated hanging this in my kitchen, instead, but my sister commented that she loves it, and it was easy to choose to give it to her instead. She has different colored chairs, and so this will coordinate well in her dining room/kitchen as well. 

I did the binding in purple, the one color not used in the main quilt top, because that is a favorite color of hers -- it's the awareness color for Chiari Malformation, which she suffers from. 

I'll put this in the  mail soon, happy that it has found a home where it will be enjoyed. 

Monday, June 1, 2015

Finished! -- EQ7 Scrap Challenge Quilt

Whew! I worked like mad over the weekend and managed to get this quilt finished & submitted by noon on Sunday, 12 whole hours before the expiration/final deadline to submit! Yay!! There weren't many entries, so maybe I have a decent shot at a prize....we shall see. Either way, my game room now has this adorable table topper, and I'm going to move all my fabric mug rugs/coasters down to a napkin older on the bar, so that we can grab one as needed.

The single table topper on the game room table will protect the table better, and make it easier to clear off when the boys want to play a game; just move the one big thing off, play the game, and put the one big thing back when done, versus them scooting the coasters around, tossing them on the floor, etc. It looks so much neater this way; I'm glad this challenge came along, as it's not something I would have thought up on my own, but sure was fun & perfect for that little table.

So...pictures! I didn't take very many progress photos, because I really didn't have time to stop and photograph; I was just sewing like mad.

Once I got the top pieced (finished that on Thursday), I started quilting. I knew right away what I wanted to do in the blue rows, so started there while I pondered what to do in the orange diamonds and the white & gray sections.

For the blue rows, I did closely spaced lines in the light blue ribbons, and then inside outlined (reverse echo) the dark blue & black arrows. I wanted the arrows to pop, and felt light quilting inside of dense quilting would help accomplish that.

all the blue ribbons are quilted

To simplify things, I did one continuous line, just stopping and pivoting the quilt then going back the other direction. Over and over and over again, inside each section of ribbon. This method took me just at 30 minutes per full blue row (it helps that the whole quilt measures only 30" x 30"). This much turning, though, meant I mainly sewed in one-hour blocks; all of that turning and guiding was rough on my shoulder, so I would sew two rows and take a break, which is why it took me all weekend. Remember, I'm sewing on a small Janome Magnolia 7318, not a long arm or anything like that. 

close up of the quilting so far....

Here's a peak a the game room; we've been in this house for almost a year, and just finally this weekend put together that cute little shelf in the corner; until now, all the games, puzzles, etc, were just stacked in the corners. Very cluttered, very messy, very unappealing. The new clean & organized shelf, and the now uncluttered table (seen below with the topper on it), make me very very happy.

the game room

table topper, on the table

So...what did I decide to do in the other spaces...? In the gray background "diamonds" (that seem to tuck behind the light blue ribbons...), I did the same straight line quilting, following the outside edge, so that the lines in each quadrant are diagonal, thus enhancing the idea of those gray units being a large diamond tucked under the ribbons. 

In the orange diamonds inside the gray I chose to reverse echo each triangle, so there are 4 little triangles quilted into each of these diamonds. The quilting on this part (the gray section & the orange inside each one) took me 20 minutes per section, so another two hours of quilting here....now we're up to 4.5 hours total quilting time. 

The remaining parts went faster. On the orange diamonds in the white, I wanted to reverse things; I didn't want dense quilting next to dense quilting; I wanted the white to stand out from the gray. So, I chose to outline the white, following the same lines as I had in the gray, but with only one line reverse echoed inside each white section. Then, to differentiate the orange diamonds in those rows, I did a concentric square/spiral square inside each one, starting in the center and following the lines of the shape of the diamond/square. This part also took me about 20 minutes per vertical row, due to all the turning inside those orange diamonds. 

"Your Turn" 30" x 30" scrappy table topper
Quilt stats: 5 white fabrics, 7 light blue fabrics, 2 black fabrics, 3 gray fabrics & 6 orange fabrics used
only 1 dark blue fabric, and a single fabric for the binding
Entered in Electric Quilt Company's Spring Fling Scrap Challenge
machine pieced & quilted on Janome Magnolia domestic machine

To finish up I did the very edges; I quilted each edge piece as though it were a cut-off middle piece. Then I trimmed the quilt, sewed my binding together & sewed it on; machine sewn to the front, folded over and hand sewn onto the back. Finished & uploaded right around noon on Sunday (we were stuck home from church due to some flooding in our area). 

Fingers crossed that my quilt wins a prize, but if not, at least the game room looks great now! 


Wednesday, May 27, 2015

Making Progress! EQ7 Scrap Challenge

While voting is still going on in the Blogger's Quilt Festival (you can still vote for my Oceans of Love quilt, if you haven't yet!), I've been busy trying to finish the EQ7 Spring Cleaning Scrap Challenge quilt.

Funny how the smaller the pieces, the longer it takes to put together!

To start with, I had to decide how to join all those little 2" squares (whether a solid square or a HST/Half Square Triangle unit) into the 4-patches that would then become the rows. I didn't want to just start sewing, so first I laid out all of the individual pieces according to the EQ7 diagram, and played with layout.

Did I want scrappy orange diamonds, or single fabric diamonds, distributed in a scrappy layout? What about the black arrows....? and how to distribute the various blues and such...? I counted how many pieces of each different color, sorted them into piles, then started laying them out in rows, making swaps and decisions as I went.


I decided on single-fabric orange diamonds, and let the blacks be mixed up; the rest didn't bother me (and there is actually only one fabric in the dark blue arrows, so that part was easy). 

Once I got it all laid out, it was time to turn individual pieces into 4-patches, which will then later become rows. I had to make sure the diagonals lined up on each one, which is not my favorite thing -- I'm more of a "good enough" quilt maker than a "precision is everything" quilt maker. When I get one just right, I get a little bit giddy and stop to take a picture.... ;) 


I'm still in that phase of construction right now....slow going! It took me a few rows to figure out a way to chain piece the 4-patches without mixing them up and getting things put together wrong; if I flip the top patch down onto the bottom one, and stack those, then carry them to the sewing machine *just.like.that.*, then they are  oriented the right way for me to just take the top one and sew along the right-hand edge (which is the seam between top & bottom). 

Then I just have to keep them in order as I unfold them, finger press that seam, and sew into 4-patches. To help with this, I keep them stacked and only unfold one pair at a time, sew that one, then unfold the next one. 


It takes me roughly 20 minutes per row, so if I actually work on this today I should be able to finish. Then assembling the rows ought to go quickly, and then rows into a top just as fast. If I can get the top totally assembled today, that leaves me.....four whole days to get it layered, quilted, and binding on in time to submit. Egads.

Hope I can make it!

Friday, May 22, 2015

BQF: Voting now open!

Voting is now underway at Amy's Blogger's Quilt Festival! I'd love if anyone wants to go vote for "Oceans of Love" in the Small Quilt Category, and then be sure to explore the other categories and vote for any other favorites!


BQF: Small Quilt Category

Wednesday, May 20, 2015

Sneak Peek: EQ7 Spring Cleaning Scrap Challenge

One of my favorite quilt blogs, "Do You EQ?" (hosted by Electric Quilt publisher/company, the publishers of the EQ7 Software I use in designing my quilts), is hosting a "Sew & Win" scrap quilt challenge. 

The instructions were to download one of three (or all three) patterns, color them in using your EQ7 software, and create the quilt from scrap fabric only.

I downloaded all three patterns, so that I could play around in my EQ7 until I decided on what would work with the scraps I have on hand.

I limited myself to just the bottom drawer of fabric, which is where I toss all my leftovers after any project. Now, most of my fabric in the top drawers (aside from the fat quarters) is also scrap, cut into pre-cut sizes (10" squares, 5" squares, and 2.5" & 1.5" strips), but for the heart of this challenge I wanted to use my actual scraps. Some of those are large pieces (the leftover edges I cut off after I finish quilting, for example), some are tiny bits. All are leftovers, scraps & remnants from other projects.

Here is a peek at what I've got started....the deadline, to be pieced, quilted & binding on, is May 31st. I hope I make it!


Friday, May 15, 2015

BQF: Oceans of Love

Time again for Blogger's Quilt Festival, which I like to participate in, when I can. This year, I have my Oceans of Love quilt --- I originally submitted this to the Sacred Threads exhibit, but it was not chosen, so I'm showing it off here instead.

I have to say, I am so insanely proud of this quilt. If you want to learn more about it, please follow the "Oceans of Love" tag at the bottom of this post (or click that link in the prior statement) and read up on how this quilt came to be, what all it means, and the ups and downs of the process of making this quilt.


This is a traditional Storm at Sea design, but all original coloring designed by me. I used EQ7 to work out the design and as my pattern for templates (for the diamond blocks) and coloring placement guide as I pieced the blocks, since the coloring is rather complex.

Every color placement is symbolic, which you can read about in detail in prior posts, but the basic meaning of the quilt is this:

The inspiration behind this quilt started with three songs. First, a song about the love of Christ, His gift to us; second, a song about compassion for those suffering, those we might otherwise ignore; lastly, a song reminding us that in the end, after all the tears have been cried, there is love. 

One day it hit me – together, these songs sum up Christianity. To love God with our whole heart, to love our neighbor as our self, to bear one another’s burdens and so fulfill the law of Christ. 

This quilt is my attempt to represent that in fabric. 

I did all of the quilting myself, on my domestic machine; it's not a large quilt -- it is 39.5" on each side, and was designed to fit in this little nook at the top of my stairs, thus the size.


The quilting is kept simple on purpose because I wanted the overall design itself to speak the loudest.

I echo quilted inside each separate element, as it were; inside the white of the cross, with pearly white thread; inside the central "drums" to echo and enhance that they are meant to be tribal style drums, along the center & radiating out from the flesh toned rays, and then inside the waves in the outer, primary-colored section to enhance the waves or curves formed by the Storm at Sea pattern.


I tailored the thread choices to the fabric, using white for the white, a Sulky gold thread for the flesh toned areas and for the drums in the center, and a variegated King Tut thread for the red/yellow/blue area; I used matching threads on the back as well, using solid white, gold or royal blue to coordinate with the top thread being used.


Binding was done in the traditional double-fold, attached to the back by machine then folded over & hand sewn to the front, using mitered corners.

I love seeing this at the top of my stairs every day; it was a tremendous challenge in precision quilting for me, and I'm very proud of the effort and the outcome put in.

I'm linking this up to the Small Quilts Category of the Spring 2015 Blogger's Quilt Festival; I hope you'll vote for my quilt or at least take a peek at the other entrants and vote for your favorite, whatever that might be!


Saturday, April 25, 2015

More Dining Room Decor

I still haven't finished quilting & binding the spoon/fork table runner/wall hanging, or even decided for sure what to do with it. I love it. Every inch of it. But I don't know that it fits with my dining room, which has a very distinct beach theme -- on the wall are photos of my family at various beaches around Brazil, a painting from our favorite beach town, beach-themed word-art and candles....beach, beach, beach. Which doesn't necessarily fit with bright, bright, bright spoon & fork, no matter how awesome they are.
notice the beachy artwork on the walls....

So, place mats. Many years ago now I made place mats for us out of recycled denim and some bright strips of fabric. I still have those and love them, but they are all wonky shaped and the bump down the middle makes eating off of them hard. Also, the wonky shapes mean some are too large to sit next to each other, so they just don't work with our new table.

I decided I need round(-ish) place mats to serve more as quilted chargers than actual large crumb catching place mats. I don't mind wiping up the table, but I do want our Fiestaware to not scratch the table. And I need them to match the dishes, and the beach theme.

What they look like with a plate on...

So, I dug through the stash and pulled strips upon strips upon strips of fabric. Sewed them up, and am now working my way through the pile, quilting them on the diagonal then cutting them into circle-ish shapes.
all the strip sets, sewn together....

the backing fabric
The backing fabric is a fun, bright diagonal stripe, so for the quilting I am using a blue thread and following the blue diagonal lines (yes, I am quilting them "upside down"). I'm quilting them wavy to give a bit of sea feel or beach feel, and I've used a mix of brights and beach-themed fabrics in each place mat to bring together the brights of the dishes and the beach feel of the dining room.
 
Turns out the quilting lines go straight (but wavy) and the stripes of the different colors go diagonal, which I like even better. This was accidental, when the first circle I cut ended up squashed on one side, which I decided should be the bottom. Just like that, diagonal became straight, and straight became diagonal, and all I can say is I'm glad it was the first one that did that because now I've done the rest that way on purpose and I love it. The slightly squashed circle shape gives almost a seashell vibe, which is even better.

One down, eleven to go! 


Saturday, April 4, 2015

Craft Swap

I mentioned in my last post that friends and I participated in a craft swap. I love doing these, because it gives me a chance to try something new, get a small project done (which gives me a nice break from whatever large project is consuming my time...), and I get something fun in the mail later on! Win-win!

For my swap item, I chose to use a template I got at IQF in Houston last fall; it's a cutting template that allows you to fussy cut for a cathedral window block, and a method of completing the block completely by machine. Awesome!

I chose my same Brazilian butterfly fabric, and fussy-cut a butterfly in the recipients preferred colors. I selected fabrics from my stash that would coordinate and enhance the butterfly, yet still go with the recipients preferences as well.

Tried out my template, and voila!, a pretty cathedral window hot pad for the kitchen!


I used Insul-Bright with the batting so it would be heat resistant and safe to use for taking things out of the oven, placing under hot dishes, etc; this way it is pretty and practical all at once.

Saturday, March 21, 2015

So, what else is new?

In the midst of all the rush to get my Oceans of Love quilt done, I also have been working on place mats for my dining table, a craft swap with friends, and planning for a future quilt project.

My mother-in-law has requested a lap quilt, in purples, as her Christmas gift this year. Now, I don't normally start working on or even thinking about Christmas before Easter, but Fat Quarter Shop has a daily 24-hour flash sale, which I check....well, daily! So when the Kool Aid Bali Crackers went on sale, a gorgeous layer cake of pink and purple batiks, I knew they would be perfect for her quilt and snatched them up.

I checked Moda Bake Shop first for quilts using only one layer cake, to make sure it would make a decent sized lap quilt; it did, or would, so I bought it, no hesitation. I'm planning to follow the Basic Math Quilt Tutorial for this quilt; looks fun and easy!

the layer cake, all spread out, and backing fabric in the middle
A few weeks later, this beautiful coordinating print also went on sale; it's flower blossoms, and she loves gardening, and it seemed to be the right color, but I wasn't sure.....I called Fat Quarter Shop, and they actually pulled both fabrics to compare and let me know that yes, what seemed to go well on my computer screen (looking at the images with each listing), did in fact work well in real life. Sweet! So I ordered the backing fabric as well (with a little extra just in case) and now I'm all set for her Christmas gift. Awesome!


Saturday, March 7, 2015

Oceans of Love....Final Peek!

One more peek, then I'm submitting to Sacred Threads and won't post again until I find out if I was accepted or not.....meanwhile I'll update on what else I've been working on in between. ha!


Saturday, February 28, 2015

Fixed it!

Got that corner all un-sewed and fixed up, and made a change to how I'm spacing the lines, which I like better...what do you think?

Before
After


Originally, I had two lines inside each curve, but I worried that when I repeated that on the narrower bands, it would look more like empty spaces that weren't meant to be there; in the narrowest parts, it would be lines quilted only 1/4" apart, but in the wider areas there would be 1" to 2" gaps.

I really wasn't excited about that, so after un-sewing the corner I had sewn to the back, I decided to start over with one line along each (top and bottom of each curve) and see what I thought. Now it has a line quilted 1/4" on either side of the curves created by the pattern, with empty space between, and the empty space looks and feels much more intentional. It also keeps it more in line with the rest of the quilting throughout the other sections of the quilt.

I think I like it! Turns out a mistake this time was a reason to make a needed change, for the better of the quilt. Love when that happens!

Now to finish....

Saturday, February 21, 2015

Quilting the Oceans of Love Quilt....

I have been hard at work quilting the top, trying to make the deadline for Sacred Threads. I knew what I wanted to do for most of the quilting, so it was fairly easy to manage.

I inside-echo quilted the white cross, with a pearly white thread for a little sheen.


I outlined the "drums" to make them seem more "drummish" (I think they only look like drums in my head, but that's okay...), and added radiating lines coming from the drum centers along the flesh-toned rays, and spreading out on either side of center on those. I used a Sulky gold thread for that part to add shine. 

Then I was stumped on what to do for the multi-colored portion. I toyed with quilting hearts into the sections, but after consulting with my quilty bestie, I decided to do inside-echo lines following the waves or curves of the storm at sea pattern, to enhance that aspect of things. 

I had a variegated red-blue-yellow-purple thread for that, and got to work, one corner at a time. Then had a lot of un-sewing to do after the first corner. Well, it wouldn't be one of my quilts without a few mini-disasters along the way, right? 

First I managed to sew a scrap fabric to the back of the quilt. What the heck?


Then, a new-to-me danger of quilting a small quilt: folding the front corner over into the area you're quilting. Egads. How on earth did I manage this???


More importantly, how did I manage to not notice this for three whole lines???? Good grief. 

Looks nice on the front side, though, doesn't it? 


Ah well, time to do some un-sewing.....

Saturday, February 14, 2015

Oceans of Love, coming together....

Whew! Lots of sewing, not much blogging, but blocks are getting done, and rows put together....the backing fabric was chosen, and I can see the finished line! Almost there!!!

Once I had all the blocks done, then I did move onto working section by section, which always feels easier to me than rows and rows. I divided the quilt into quadrants, sewed each quadrant, then assembled those larger "blocks" into the rows needed to make the top.
Top three individual quadrants, and the pattern for reference

row one assembled


second row of individual quadrants


The finished top!

backing fabric and thread
The back has a repeating verse about God's love....fitting for the theme of the quilt

Saturday, January 31, 2015

Oceans of Love, continued....

The squares are all done, the diamonds are started, and it's looking like maybe I'll finish on time!

All the square-in-square blocks, done!

The first few, now corrected, diamond blocks....

Saturday, January 24, 2015

Oceans of Love (the Sacred Threads Quilt), continued...

It's begun! Fabric has been cuts, blocks (tiny little blocks....the wall hanging will be just about 40" in each direction....) are being sewn.....I am in a race to make the deadline, but not sacrifice quality. I'm trying to sew with precision, which is hard for me.....eek! Fun, challenging, but hard.

I've cut all the pieces, and they are in baggies waiting to be sewn. Each baggy holds one size/shape of patch, so that as I follow my EQ7 print-out I can pull the correct piece from the correct bag. 

I originally planned to sew in sections, but after trying the middle and realizing those diamond units are HARD, I decided I had better do all the squares/same type of block at a time so I can chain piece some. Otherwise, I'll never make deadline. First up, the square-in-square blocks....then back to the diamonds. 

pieces cut and ready, in baggies.

The first block..
 The first diamond block I tried ended up wonky, which is what made me change my mind. I'll need to find a tutorial on aligning those blasted triangles before I proceed with the diamond blocks. Putting it aside for now and moving on with the squares....
See how the blue triangle is completely lined up wrong? Yea, not gonna work.
Moving on....
 Chain piecing the square-in-square blocks works really well, though! Even if they are teeny tiny.

See how small?!

 Wish me luck! The deadline is a bit earlier in March than I was thinking...it's got to be pieced, sewn together into a quilt top, and quilted with binding on and ready by early March. Much work to do!


Saturday, January 17, 2015

Sacred Threads

I still haven't finished the Bon Appetit table runner, but I started a new project.

There's a quilt exhibition this summer, called Sacred Threads, and the submission deadline is mid-March.

I've had a quilt rumbling around in my head for a while, or at least the idea that I need to make a quilt based on this inspiration, but I've not had reason to sit down and work it out. Until now.

After much playing and trial & error in EQ7 I have arrived at the perfect design, bought fabrics (luckily coinciding with a fabric sale at my favorite semi-local quilt shop), started cutting.....I cannot wait to finish this.

So much of me is in this quilt....the inspiration comes from three songs, and sums up what it means to me to be a Christian.

Oceans of Love: the beginning
As with most of my quilts, it is full of symbolism and meaning. The colors were chosen based on one of the three songs, White, by Mike Rayson. This song uses the primary colors as a symbol of God's gift to humanity of his son, Jesus. Yellow, a baby born to die; red, the price He paid with his blood to save us. Blue, a river of mercy, forgiving us, making us His own. The white, likewise from that song, a symbol of how God looks at us (pure, clean and perfect) once we trust in and accept His gift to us of salvation through His Son.

The pattern is a Storm at Sea pattern, with a slightly tweaked arrangement to get a square layout instead of a rectangle, because I wanted the central cross to be just a bit less "cross shaped."  The pattern was chosen, though, because of the second song, After the Last Tear Falls, by Andrew Peterson. This song talks about how, in the end of everything, when all pain is over and done with, when we feel we can't go on one more moment, when all seems helpless and hopeless, there comes one more thing after all of that: love. Oceans and oceans of love, God's love which upholds us, strengthens us, carries us through all those hard, impossible, hopeless feeling things. We will get through those things, and once through to the other side of them we will see, we're carried in His hands, in an ocean of love. It speaks of end times, but I like to think of it as individual ends, each time we come through a last tear falling for any given situation, still God's love is there, all around us. And in the true end, the big End, still it will be God's love that wins out. So, Storm at Sea. Because in the storms of life, we're still in a sea of love.

The center is the most ambiguous and hard to capture, but comes from the song Bang a Drum, by Jon Bon Jovi; I love how this song challenges us each to care about others. To speak up for the voiceless, to help the helpless, to hold true to our beliefs, to never forget that we are all, each one of us, interconnected, and thus to go and live life in a way that honors that. And so, in the middle, "drums" -- I muted the colors of the outer edges, because our actions can only ever be approximations of walking in God's love; we can't accomplish it without Him. The white comes into the center, bringing us the gift of Christ; the flesh tone rays spread out, into the darkness, carrying the light of Christ into the world as we help one another, be that shoulder to lean on during the dark times, give a helping hand, pray for one another, minister to one another, etc.

I thought of examples like the Good Samaritan, stopping to care for a wounded traveler. Sharing God's love doesn't necessarily mean preaching and using words; it often means acting. Doing. Being. Taking dinner to the family of a cancer patient. Babysitting for the single mom down the street. Driving a friend to a doctor's appointment when her car is broken down. Hiring an out of work contractor to paint your house, because he won't accept a handout but will gladly take on a job. Donating food to the food bank, blankets to a shelter, time to volunteer, and so on. It's us, Christians, doing these things, being the hands & feet of Jesus, that pushes back the darkness, that helps to carry one another through those times we feel far away from God's love. It's us, living out the commands to love God with our whole heart, and to love our neighbor, that fulfills the law, that becomes part of that sea, that ocean of love.

We are all an intricate part of God's plan, sometimes off in the dark, sometimes in the center of His will banging a drum, sometimes carrying His light to the corners that need it most. And so, finally, with the Sacred Threads exhibit as a catalyst, I've designed this quilt. I hope I can pull it off in time, and as well as it deserves....

Saturday, January 10, 2015

Wall Hanging, or Table Runner?

I can't decide....I started this as a "between seasons table runner" for my table. It coordinates perfectly with all my Fiestaware dishes, but doesn't really coordinate at all with the general decor in my dining room. Hmmm.
laying out my strips to figure out placement

I'm thinking maybe it will end up as a wall hanging in my kitchen instead.

I bought the pattern at IQF in Houston last fall, and I love it. I so rarely do things from other people's patterns, but....I had to have this one. I bought a few other patterns from this shop, Cherry Blossoms Quilting Studio, too. Love their stuff!

This pattern was very easy to follow, and sewed up really well. I'm stalled out as I try and decide what to do with it...it needs a bit more quilting and then I have to bind it, but I wanted to go ahead and show how it is so far and maybe you all can help me decide --- go with it on the table, or hang it on the wall...?

before quilting
halfway quilted;
I will add diagonal lines in the other direction to complete a diagonal cross hatch quilting style. Also debuting binding options...