With quilts finished for Son 1 and Son 2, my youngest suggested it was his turn for a quilt. I hand't actually planned to start his yet, because he very rarely sleeps in his own room -- our bedroom has a sort of dressing room area that holds an extra bed and he mostly ends up sleeping there. So why make a quilt for a boy who won't sleep in his real bed in his own room? Well, in hopes that said quilt will be the reason he needs to move back where he belongs, of course!
I took a lovely time out to work on the 15 Minutes of Play Architecture Challenge, but now that it's done (just waiting on binding), time to get on to the quilt my youngest wanted. Being as he's 8 yrs old, his tastes are a little.....well, fun. Whimsical. Little boy-ish. But not too little boyish, as he does have older brothers who are teens or almost teens. So what did Son 3 want? Why, a Super Mario Quilt, of course!
I scanned the internet for ideas. I found an absolutely adorable -- truly smashing! --
Quilt Along over at Cut to Pieces. I ruled it out right away, because living in S. America I do not have access to the fusible stuff that makes her QAL easy to do instead of absolutely crazy. I know my limits, and piecing a bunch of squares that finish at 1", in the traditional, good old fashioned piecing method --- not gonna happen. If you do have access to fusible stuff, her QAL is fantastic and I highly recommend it. If you don't, feel free to use my design instead.
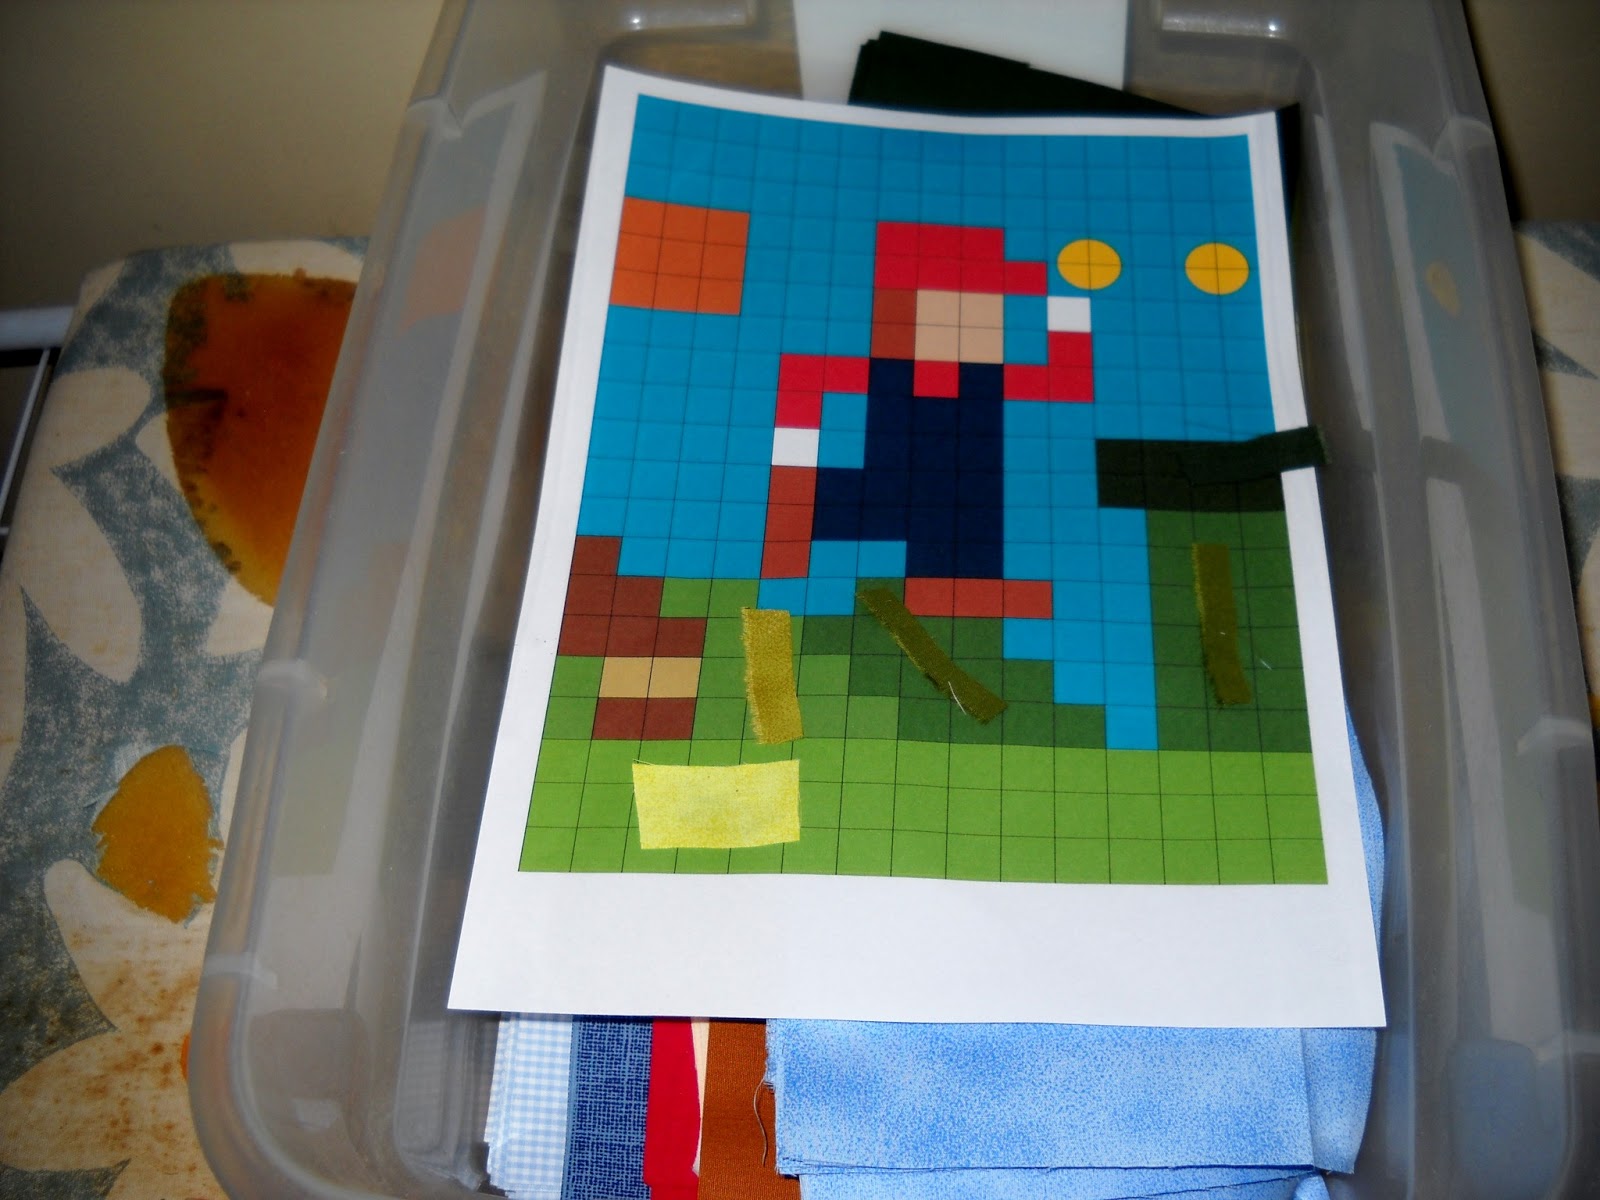
Lucky for me, my son is fairly opinionated and wanted one big scene from the video game anyway, rather than several different characters or images. Whew! His desire and my
laziness self limitations work nicely together! I pulled up a simple patchwork layout on my EQ7 and had the boys help me color the squares to resemble the desired scene. My boy was very specific with exactly what he wanted, so I had him sit next to me and tell me when I got the colors just right. I chose the smallest size patch (5" finished) I was willing to work with, we colored in accordingly, and the design was done.
 |
| the EQ7 image |
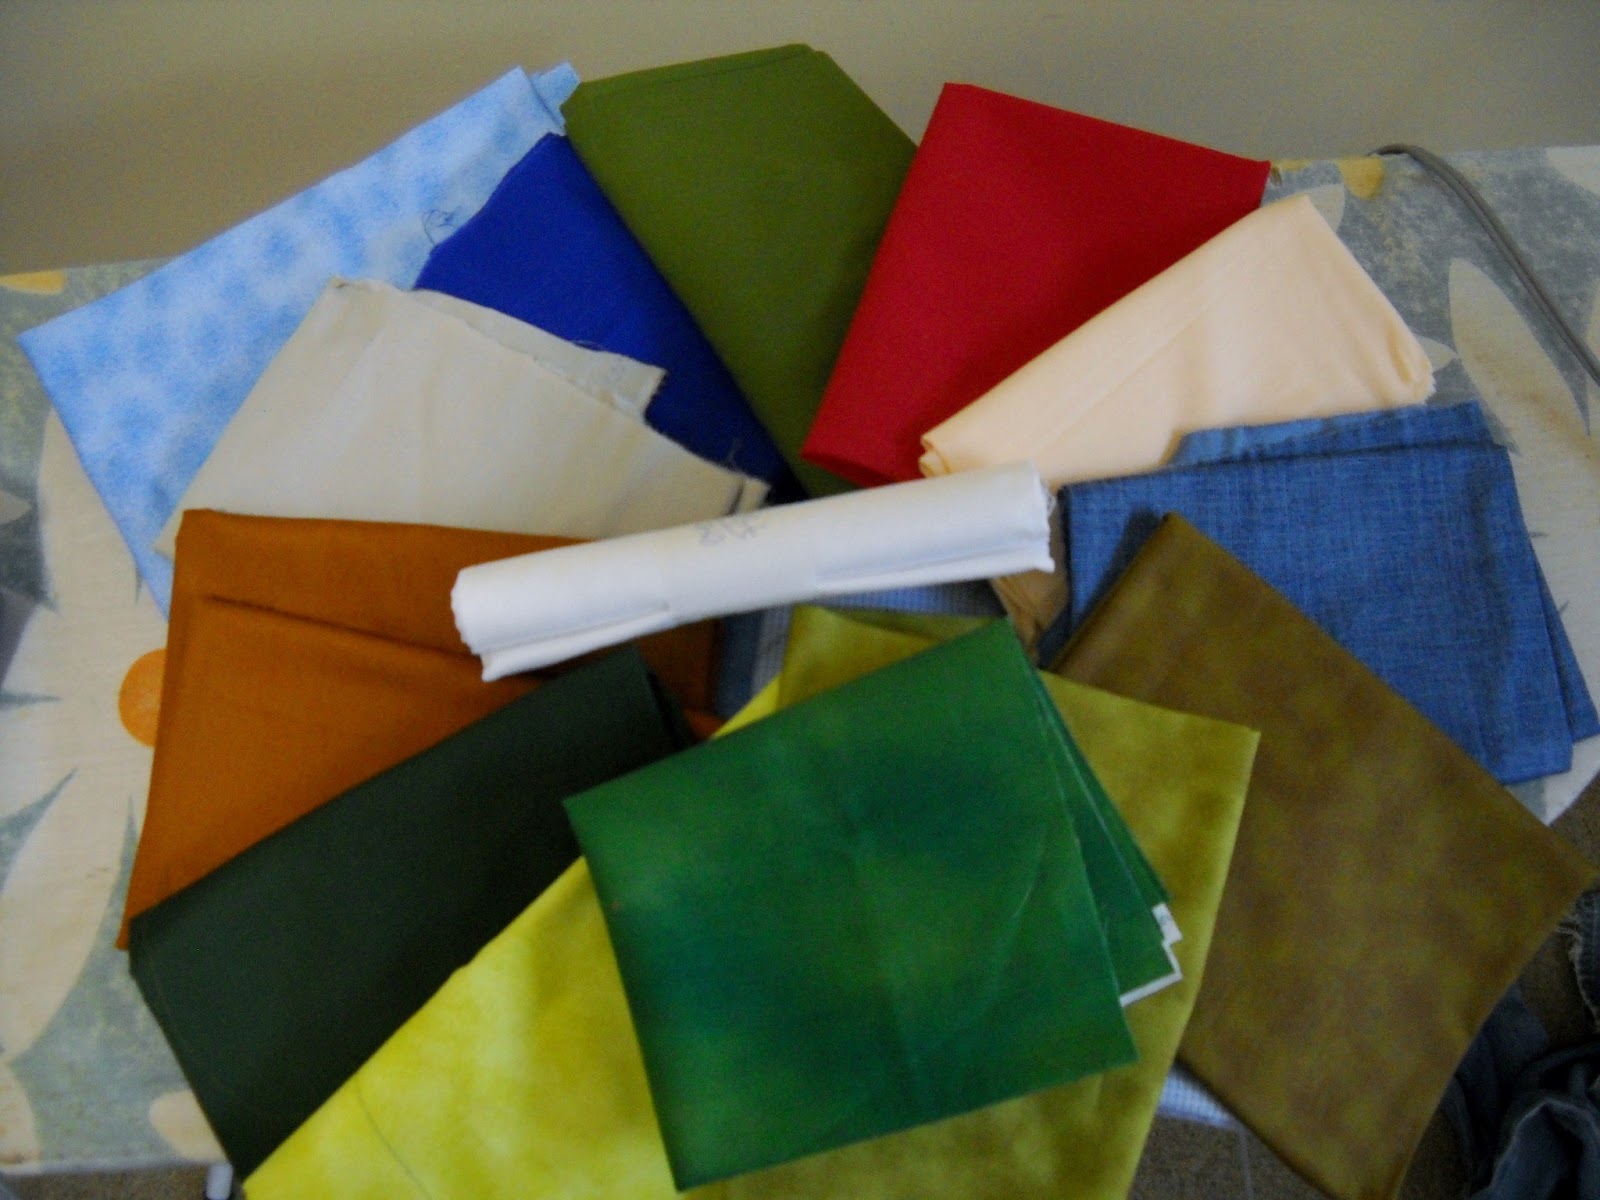
Later, I took my boy with me to buy fabrics, so he could confirm color choices, then I actually starched the fabrics before I cut them into the needed squares.
 |
| all the fabric |
Why did I starch the fabrics?? Well, I've noticed that my quilts end up wrinkly. I have two theories on that --- one, some time ago I gave up pressing. At all. I finger press my seams as I go, but I quit pressing finished blocks, or rows, or quilt tops, or backs, or anything. And, well, it shows. Theory two is that I don't baste sufficiently, which is probably also true. This quilt needing to look crisp due to the design, I decided I'd better get over my lazy self and not skip steps like that anymore. So, I starched the fabric and then cut it.
 |
| starching... |
 |
| starched... |
 |
cut!
that is a LOT of squares. so glad I went with 5" finished! |
Next up, let's get sewing!